Thursday, May 10, 2012

Down on the Farm

I think this is the last week I will be able to post Monday through Friday.  I can't create one layout per day to be able to post between taking care of my daughter, house and MASSIVE to-do list and working here and there!  I do have a few more goodies to share from my weekend crop, but beginning next week I will only be posting 2-3 days per week.  It will probably be Monday and Wednesday.  I want to make sure what I DO post is my best work, so I will have more time to devote to crafting that way.  


So what I am sharing today is a fun, happy layout!  We got my daughter this farm toy that she just adores.  She likes to bounce to the music, crawl through the door, and play peek-a-boo with my husband and me.  She loves the toy, but in all honesty I made the layout because I wanted to play with the new farm materials I saw at my favorite scrapbooking store, Right at Home Scrapbooking http://www.rightathome-scrapbooking.com/.


There are some different products here...the yellow wood paper and small letters are Jillibean Soup, the flower print is Doodlebug, and everything else is Kaisercraft.  They layout idea came from the A Cherry on Top blog: http://acotcherrybits.blogspot.com/2011/10/paper-crafting-with-we-r-memory-keepers.html.


I used the same photo placement and title placement on my own layout because it was just so...well, fun!


I put a tiny flower in the center of the three pictures that I made with 2 circles punched out of paper and a button-shaped brad.  
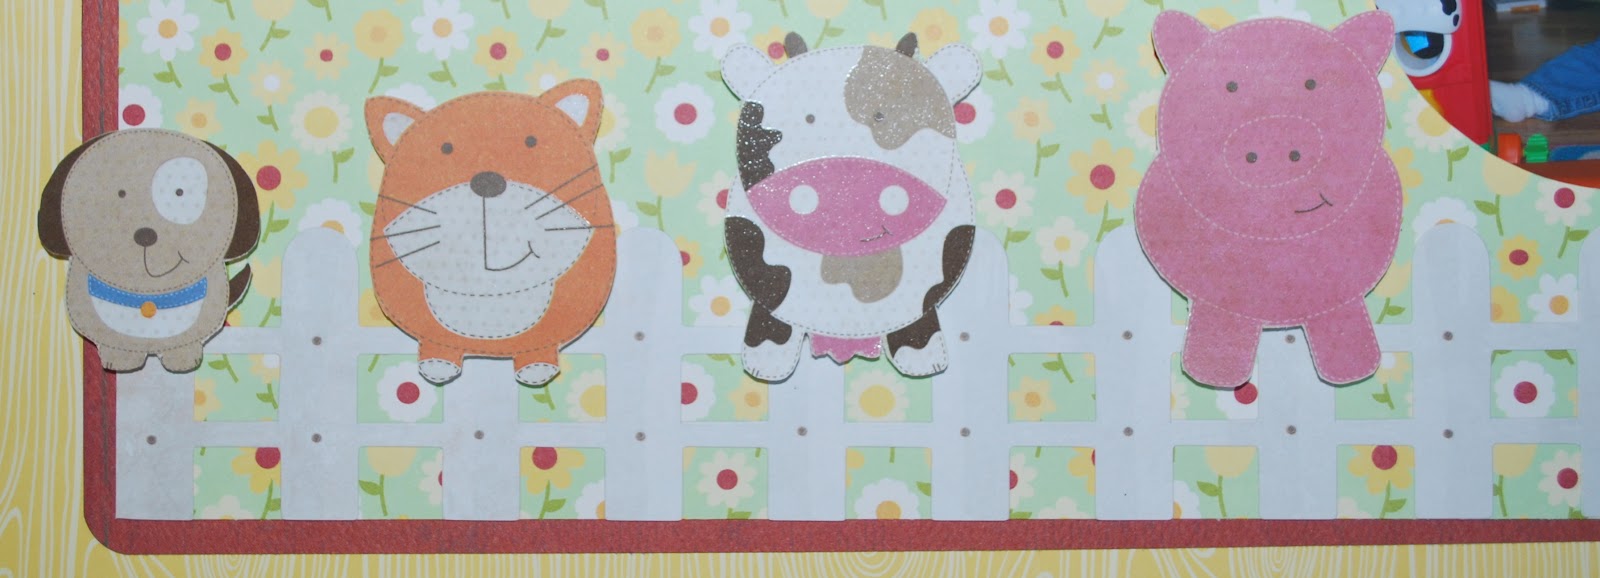


The farm animals were fussy-cut from a sheet of scrapbook paper.  I put them on pop dots to make them stand out from the fence.  This was a pretty simple layout...no fancy stuff here!  But I wanted it to be simple to let the pictures take center stage!  Because the background colors are so light, the red in the photos really draws you in and you can't help but notice silly Grace!


Well thanks for stopping by!  I hope to be back tomorrow with my daughter's birthday mini-book.  I just have to make time to add the journaling!  Have a great afternoon.


Wednesday, May 9, 2012

Feeling Tropical!

There are many firsts in the life of a mom.  If you are like me you celebrate every first, camera in hand, knowing that it will be the "last time ever she blows her first kiss" or "the last first time she'll ever eat spaghetti on a Tuesday in May!"  OK, I'm not THAT bad, but I do have literally thousands of photos of my daughter's first year.  Some are just sitting, unused, in my photo organization program.  But others just seem to scream "Scrapbook Me!"  The first time my daughter saw and tasted pineapple was one of those. The photos were just too fun to pass up!


Sometimes the background paper just makes the layout.  This one does.  It is just so "1960's-shore-town-tropical-resort-hotel-wallpaper."  I LOVE it!  And the colors couldn't be more perfect since she is wearing a bright pink shirt.


I matted the photos all on bright green Bo Bunny polka dot paper to unify them.  I journaled around the photos because I didn't want to take away from the background paper.


I added three flowers which form a visual triangle leading the eye around the layout.  They match the color of the Bo Bunny paper but match the shape of the flowers in the patterned paper.  The result is a sense of coordination.  The flowers are have a brass brad in the center of each.


I used embossing powder the same color as the brads to stamp this fantastically tropical flower.


The pineapple tag is...a tag from the pineapple!  I saved it because I knew I wanted to scrapbook these photos the day I took them!


And that is my daughter's first encounter with a pineapple!  It was fun when it happened and oh so fun to relive now!  Thanks for stopping by.  See you tomorrow when we'll go "Down on the Farm!"

Tuesday, May 8, 2012

Spring Pastels

My second favorite layout from my weekend scrap-fest has only one photo--an unusual occurrence for the girl who uploads HUNDREDS of photos per day!  But sometimes a single-photo layout can be especially stunning!  This particular photo was taken in front of the church right before we had my daughter baptized.  I wanted to highlight just what it meant to me with a special layout.


I based this particular layout on another I had seen on Pinterest.  Here is the link  http://stampingwitherica.blogspot.ca/2011/10/mds-blog-hop-gratitudethanksgiving.html  and here is the original layout:


If you read my bog often you will notice that I often use a layout or sketch as a starting point, but that I like to make many changes to make it my own.  My creative license, if you will!  In this case, I liked the placement of the photo, the banners and the words bordering the photo.


I used a neutral as my background but matted the photo on a pretty pink pattern to draw out the color of my daughter's dress.  I inked the photo mat to help it stand out (I pretty much inked EVERYTHING in this layout!)


 I chose colors for the banners and the flowers that were found in the photos like pink, green and blue.  Because I knew I'd be using the patterns in small doses I didn't worry that they'dclash.  Plus, inking the edges helps separate one pattern from the next and allows you to use a polka dot and a stripe together!  I did try out many combinations of papers before finding those that I REALLY liked.  
These flowers add such a delicate touch to the layout, I think.  They were cut on my Sizzix machine using a Die Namics die called Botanical Beauty.  I curled up the petals using a pencil and inked the edges in brown.


The final touch on my layout are the letter stickers.  The pink, brown and green ones are all recent releases from Jillibean Soup.  I chose short words and phrases that described the day.  


And that is all!  Feel free to leave a comment with any questions.  I will be back tomorrow with a fun, tropical layout and later in the week hope to share my daughter's birthday book.  Have a great day!

Monday, May 7, 2012

Mmm!

I am back from a fantastic weekend spent crafting and cropping with some really creative ladies.  I was proud to say that I finished 2 double page layouts, 5 single page layouts, a mini-book about my daughter's birthday and some thank you cards while I was away!  I am sharing my very favorite layout first!


I just loved the way these pictures turned out, especially with the metal chair Grace is sitting on, so I wanted to play around with them.  I narrowed it down to 4 that really show her enjoyment because I had a layout in mind that I had seen on Pinterest.  Here is the link:  http://kellynoel.typepad.com/living_the_dream/2011/08/glee-club-reveal.html.  And here is the layout:


For this layout I used the basic structure as a sketch to inspire my layout.  Mine is a bit more girly I think (!)  


I have this obsession with pink and brown lately, so those are the main colors I chose for the layout.  I like the way the light pink stands out against the dark brown background.  I used the darker pink as an accent to draw your attention to the pink jacket Grace is wearing.  Both are from Bo Bunny.  The striped paper, a recent Bella Blvd release, makes me think of an old time ice cream parlor so I added that in 3 places to make the eye move around the page.


I wanted to see more of the striped pattern so I used the negative from one of the m's I punched with my Sizzix Night and Day font.  The title is short and sweet (haha!)  The ice cream cones were made on the Cricut using the Straight from the Nest cartridge.  I then put some Glossy Accents on the ice cream scoops and glitter on the cherries.


I journaled with a white pen which I also used to draw some stitching around the journaling block.  I pleated the ribbon using liquid glue and lots of patience!


And that is it.  My favorite layout from this weekend which is now displayed in my kitchen!  I will be back tomorrow with another favorite.  I hope you had a great weekend and thanks for stopping by!

Thursday, May 3, 2012

Bear Bear Bear

Trying to squeeze in another post this week; I have been crazy busy with the birthday party, house guests, and now I am attempting to pack for an entire scrapbooking weekend away!  It seems that everything happens all at once!


This layout I am sharing today took me a week to finish!  I would devote a couple of minutes to it whenever I had free time, then put it aside when I was busy.  I am the kind of person who hates to have an unfinished project laying around, though, so I'm glad I finally got it done before my weekend away!


The colors were inspired by the bear and the chair ;)  Some of the patterned paper was some older stuff I had but the background paper and the plaid brown are both from the American Crafts Amy Tangerine line.  I cut the coordinating strips of paper in various widths from 1/4 inch to 1 inch.  Then I cut them to different lengths as well.  I inked them all with brown to help them stand out.


The photos are matted on brown card stock and I placed a large brad that reads "I Love You" in the corner.  This brad is one of three embellishments I used to create a visual triangle on my layout.


For the title I used my Sizzix to cut out the words in Playground font.  All letters are lowercase except for the A to give a childlike look.  I adhered them with a glue pen to a banner shape I hand cut.  Then I adhered the banner with pop dots to give it dimension.  I attached a tag that reads Moments with a tiny pink brad.


The buttons are the third of three embellishments and the colors are a perfect match!


Thanks for stopping by!  I will be back Monday (I hope!) with the first of many layouts that I plan on completing on my mini-vacation!  Have a great weekend all!

Tuesday, May 1, 2012

Pink and Brown Birthday Bash


All the planning and preparations of the last month or so ended in a wonderful first birthday party for my daughter that went off without a hitch!  I planned for this birthday party almost as much as I planned for my wedding!  But I felt like such a special occasion deserved a special celebration!  The first year of my child's life was AMAZING, and I wanted to enjoy the party!  


I made the banner using Bo Bunny polka dotted papers and the Cricut.  The colors I chose for the party were brown and pink (see my last post for the party invites) so I converted the photos to sepia to match.  These photos show the progression, from Birth to now, of my Grace.


I ordered a dress for my daughter from Etsy:


It has removable bows on the shoulder and an adorable appliqué owl above the hem.


My husband was in charge of the baking and cake decorating, but I made a cake topper on the Cricut.  I also punched some flowers in coordinating paper to go around the cake.


By far my FAVORITE part of the party planning was the special high chair.  This was hubby's department as well!  I searched for an old wooden high chair and found one at a consignment shop for $25.  My husband sanded it down and put several coats of gloss white paint on.  Then he used the negative left from a flourish I punched on my Sizzix as a template.  We decorated it with ribbons and balloons and used it when Grace ate her cake and also took it outside for a mini photo shoot!


And that was Grace's first birthday party!  It was the most fun I've had in quite a long time and I was super excited to be able to say it was completely DIY!  Thanks for stopping by, and feel free to post any comments or questions!  

Thursday, April 26, 2012

Birthday Girl

Grace, my pride and joy and my reason for waking up with a smile every morning, will be 1 year old on Saturday.  I can't believe how quickly the time flew by!  Part of me is sad that I'll never get those tiny-baby-cuddle moments back.  But mostly I am blown away by the spunky personality my girl has developed and can't wait to see who she grows into!  I always knew that I would love being a mom.  But I had no idea how much!  I am in awe of her at every moment, and miss her when I am away from her for an hour!


For this reason, we are going all out for her first birthday!  No pony rides or anything, but we feel like this day is a pretty big deal!  I made her invitations and everything else, including her dress the banner and the cake, are coordinated to match!  My husband (the food crafter in the house!) is making her cake and I am making a cake topper using my Cricut as well as a banner.


Today I am sharing with you the invites that I made.


I made these before I owned a Cricut, so everything is hand cut using a template printed from the Internet.  To make the owl I just traced the outline, then cut away the outside of my template and traced the abdomen, then cut out one eye and traced that, and so on. The flourish that he is standing on was cut with my Sizzix, though.  It is a bit time consuming to hand-cut the pieces, but once I get a sample made up I turn it into an assembly line process and get my hubby to help!  The polka dot papers are all Bo Bunny, which are some of my favorites!


Well, that is it for today.  Now to finish the preparations for the big day!  I will be back Monday with some pictures of the banner as well as all the fun!  Have a great weekend!