So when I saw how great these pictures turned out I knew the title right away! Sometimes you want to scrapbook some pictures just because you have a fun story to tell. And I didn't even tell the story behind the photos, because they speak for themselves! Instead I used the photos as a vehicle (haha) to tell the story of the nickname.
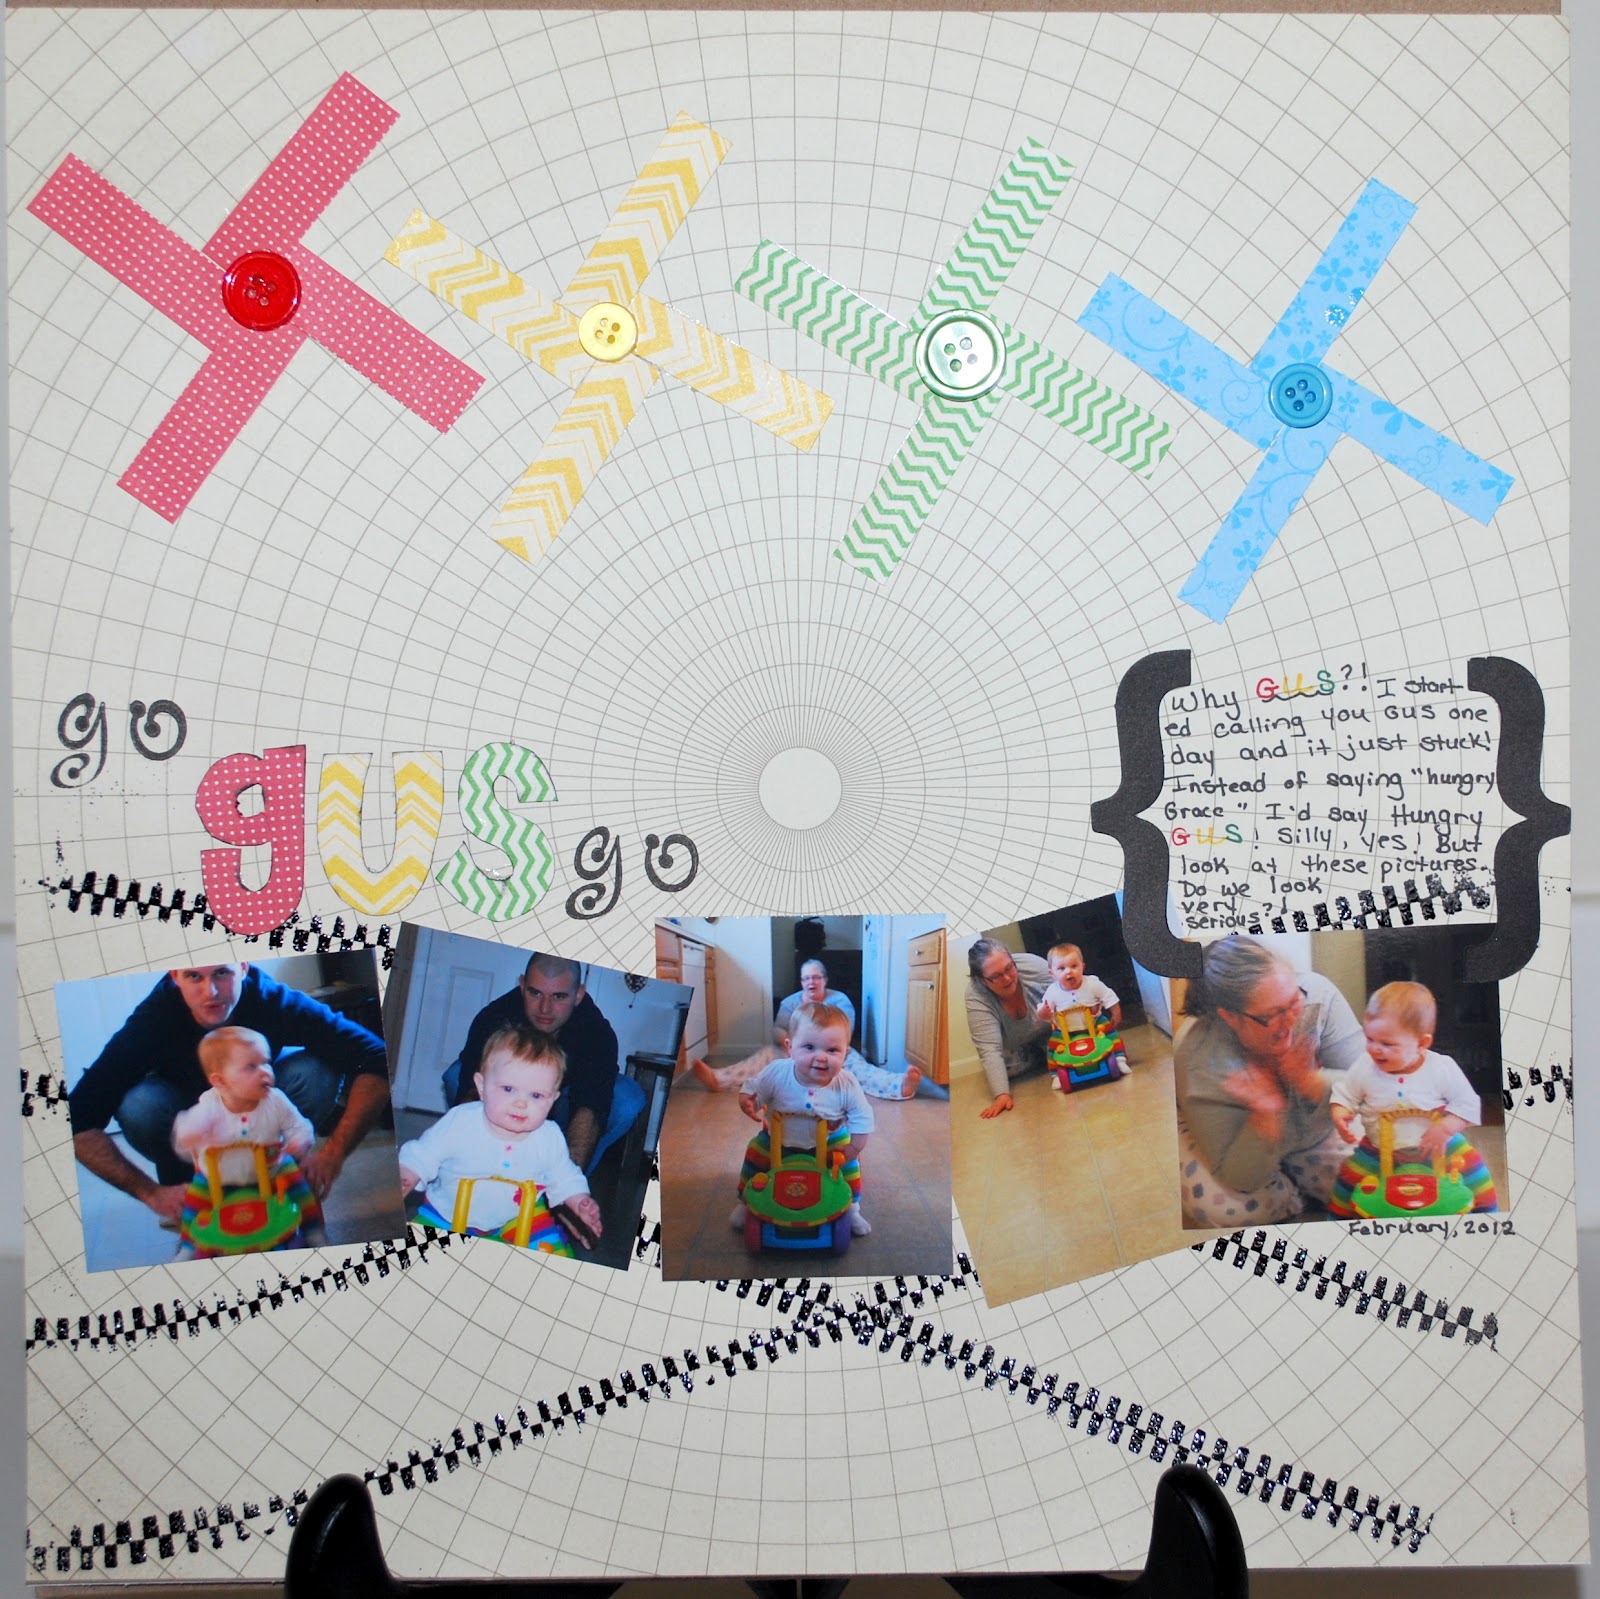
When I planned this page I looked for things that would convey a feeling of movement since we were rolling her on her car in the photos. The first thing I chose was this awesome background paper. Studio Calico is the company who makes it and it is called Plano. It is no longer manufactured but I was able to find it online by doing a google search.
The next thing I did to show movement was to create these pinwheels. They were quite simple to make. All I needed were 4 strips of paper the same size and one button. I chose these colors for two reasons. First, they match the car. Second, they are traffic light colors. I also chose patterns that convey a sense of movement like the polka dots and the zig zags.

My favorite part of this page is the tire tracks. I made them using a dollar store monster truck. At first I was going to roll them in brown paint, but then I came up with an even better idea! VersaMark and black embossing powder! It gives them a raised, "burn rubber" kind of look. I was having so much fun I wanted to roll them all over the page but I restrained myself! A little trick: only dip the front wheels in the glue.

My final touches were the title which is done in the same papers as the pinwheels with the edges inked so they look "dirty" as well as black embossing powder. I staggered the parts of the title, again for the illusion of movement. The pictures are placed at angles, again, for movement. And last, my journaling block, which balances out the title perfectly. The word Gus is done in colors to match the word in the title. The brackets draw your attention to it and also draw the eyes downward to the pictures.

And that, my friends, is the "science" behind this particular page! It was LOTS of fun for create. I hope I've inspired you to look at one of your child's toys in a new light. Marbles can be dipped in paint and rolled on the page. Plastic animals or dines can stamp tracks across the paper. Shape sorter pieces can be dipped in paint and make different shaped backgrounds. Leave a comment below with any other cool ideas for how to scrapbook with toys!
No comments:
Post a Comment